InvenTree Advanced Sheet Label

melektron
last modified: 04 Feb 2026
A label printing plugin for InvenTree which provides support for printing labels on off-the-shelf label sheet layouts and adds some more useful features compared to the sheet label plugin included with InvenTree.
Index
Installation
[!NOTE] The latest version of this plugin currently supports the following InvenTree versions:
- 1.0.x (tested with version 1.0.5)
- 1.1.x (tested with version 1.1.3)
For older InvenTree versions, use version
1.2.2, which supports the following InvenTree versions:
- 0.15.x
- 0.16.x (tested with version 0.16.5)
- 0.17.x (tested with version 0.17.14) Some even older or newer versions might also work, but have not been tested.
If you are having trouble installing, see Common Issues for possible solutions or create an issue.
The simplest way of installing is by using the Install Plugin button on the InvenTree Plugin Settings page and then entering the package name:
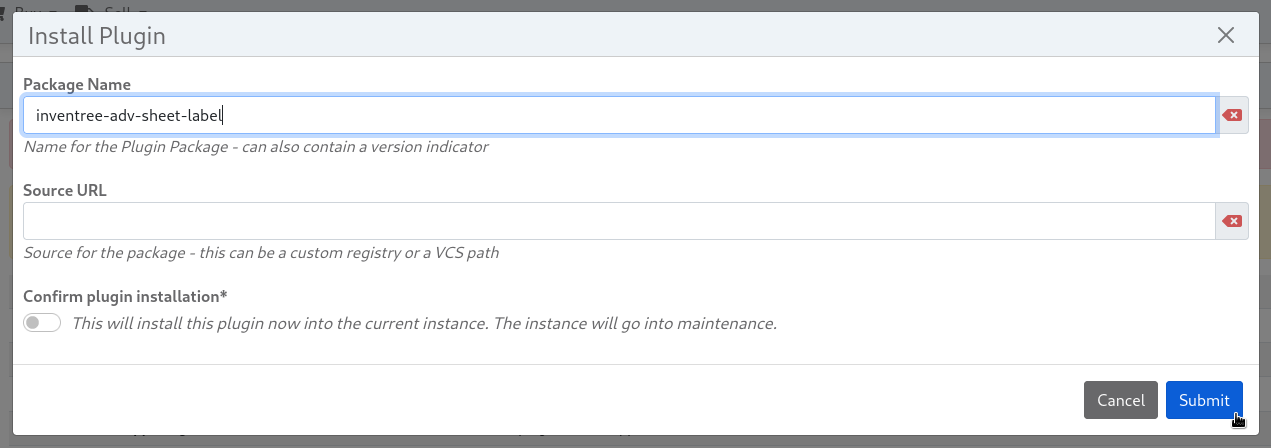
Alternatively, you can install this plugin manually in the InvenTree container as follows:
pip install inventree-adv-sheet-label
Or, add the package name to your plugins.txt file (this is automatically done when using the UI method) to install automatically when using the invoke install command:
inventree-adv-sheet-label
In any case, after installation, the plugin needs to be enabled in the above mentioned plugin settings page:

Usage and Features
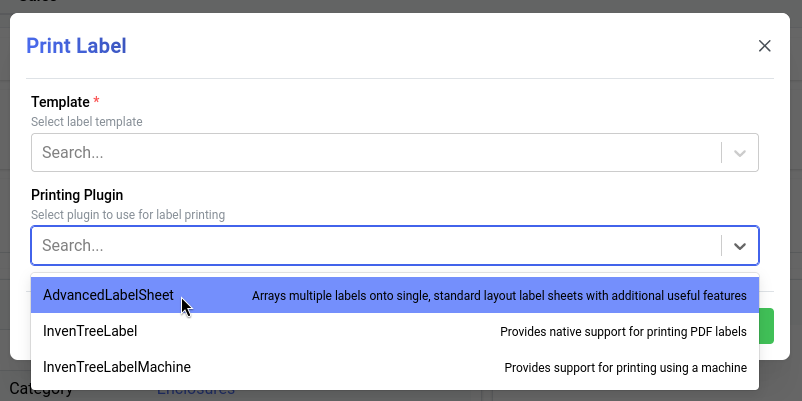
This plugin adds the “AdvancedLabelSheet” printing option to the label printing dialog:
Sheet layout
Unlike the builtin sheet label printing plugin of InvenTree, this plugin presents a selection of preconfigured sheet label layout options corresponding to various kinds of off-the-shelf label printing paper that can be purchased from most office supply shops and easily printed on any standard 2D printer.
You can select the layout corresponding your paper in the Sheet layout dropdown:

These layouts are identified by a several digit number written on the paper packaging, which (as far as I can tell) is unique to the layout independent of the manufacturer (at least where I live). The identifier is however just a string, so any other scheme can also be used in the future.
The dropdown list also shows some additional information about the layout for orientation:
- Paper size (e.g. A4)
- Dimensions of the individual labels
- How many rows and columns are on one page
- Whether the labels have rounded corners
Currently supported layouts:
| Layout Identifier | Paper size | Label dimensions | Label layout | Corner style |
|---|---|---|---|---|
| 8160 | US Letter | 66.7mm x 25.4mm | 3 columns x 10 rows | round |
| 22805 | US Letter | 37.0mm x 37.0mm | 4 columns x 6 rows | sharp |
| 4780 | A4 | 48.5mm x 25.4mm | 4 columns x 10 rows | sharp |
| 4737 | A4 | 63.5mm x 29.6mm | 3 columns x 9 rows | round |
| 4201 | A4 | 45.7mm x 16.9mm | 4 columns x 16 rows | round |
| 7120-25 | A4 | 35.0mm x 35.0mm | 5 columns x 7 rows | sharp |
| 7160-10 | A4 | 63.5mm x 38.1mm | 3 columns x 7 rows | round |
| 4360 | A4 | 70.0mm x 36.0mm | 3 columns x 8 rows | sharp |
| 1367853 | A4 | 48.5mm x 16.9mm | 4 columns x 16 rows | sharp |
| 4210 | A4 | 38.1mm x 12.7mm | 5 columns x 22 rows | sharp |
| 1367586 | A4 | 70.0mm x 36.0mm | 3 columns x 8 rows | sharp |
| 8724 | A4 | 46.0mm x 11.1mm | 4 columns x 21 rows | round |
| Avery 50x25-R | A4 | 50.0mm x 25.0mm | 3 columns x 8 rows | round |
| Avery 105x42-R | A4 | 105.0mm x 42.0mm | 2 columns x 7 rows | sharp |
| Avery 40x12-R | A4 | 40.0mm x 12.0mm | 4 columns x 17 rows | round |
This selection is limited to whatever users of this plugin have contributed. If the paper layout you need is not included, please file an Issue with the “Sheet Layout” template or - even better - contribute it yourself. See the Adding new layouts section for details.
You can also select one of the two Auto sheet layout presets. These will automatically select the correct sheet layout for the label template you are printing. This is done in one of three ways:
- If you have a specific layout that’s always used for a specific template, you can add the
{"sheet_layout": "..."}metadata key to your label template configuration (replace … with the identifier of the layout. This might not be the same as the display name, see here what the identifier is). This is the cleanest way configure the correct layout for your templates, but it is no longer easily available as of InvenTree version1.0.0due to the Django admin UI being removed. - If the selected template template has no such metadata, the plugin will attempt to find a layout with exactly the required label size and use that one. If multiple matches are found, the first one is selected while preferring ones with round or sharp corners depending on your selection.
- If no exact matches are found, the closest layout that can fit your label template will be selected and shown to the user in an error message. The user can then decide to use this option by selecting the ‘Ignore label size mismatch’ switch.
Number of labels
The Number of labels field lets you print multiple of the same label in one go. By default, the number of labels printed is 1, resulting in an output like this:
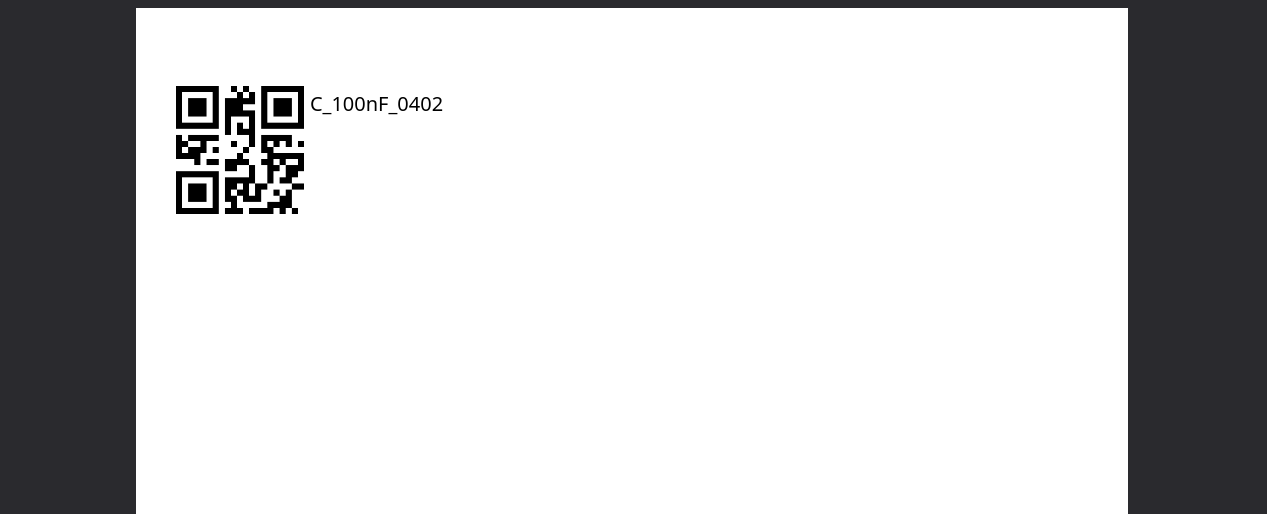 (The label template is only an example and this is only part of a page)
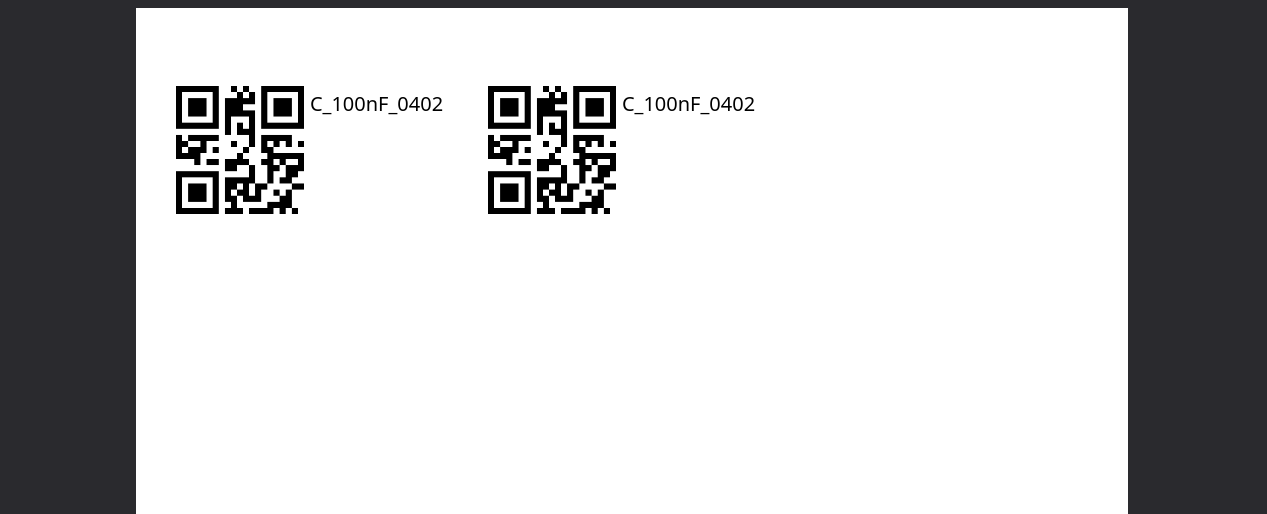
Let’s say you want to print two of the same label. By entering the desired amount in the field, multiple of the same label will be printed at once, of course arranged according to the selected layout:
If you are printing labels for multiple items at once, such as for an entire selection of parts, this amount is applied to all items. For example, lets print two labels for each of those four capacitors:
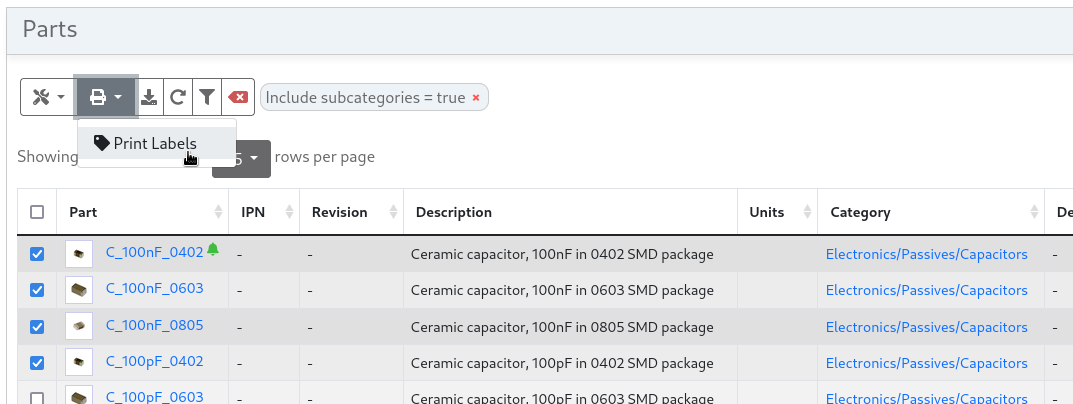
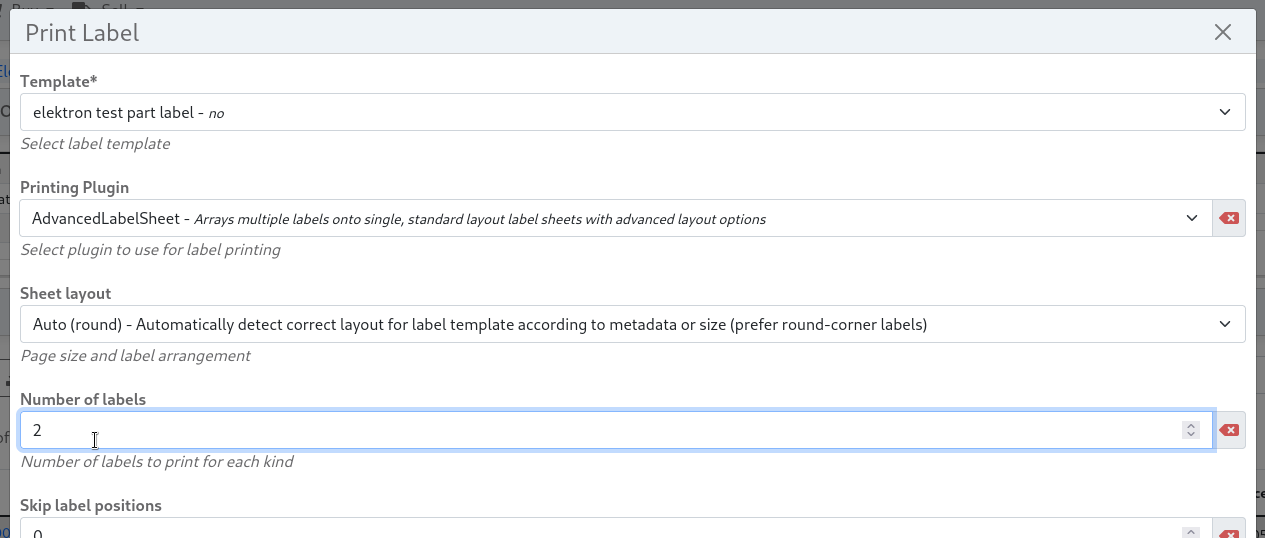
This results in a printout looking like this:
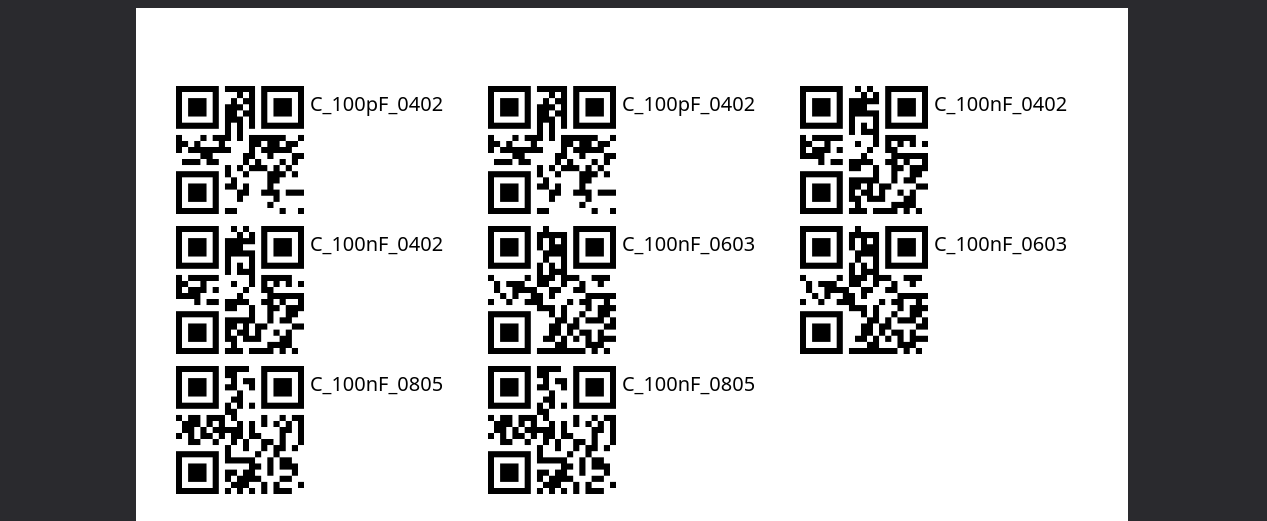
You can also specify to print zero labels. This is useful in combination with the “Skip label positions” and “Debug: Print border” options to print an empty grid of cells for testing.
Skip label positions
When printing on label sheets, it is likely that you don’t use up the entire sheet of labels at once. Maybe you only want to print a single label and then another one later. To do so, you can enter the number of labels on a sheet that are already used up in the Skip label positions fields (counting from top left to bottom right). These positions are then skipped and labels will start to print at the next unused position. This also works when printing multiple labels.
For example, let’s assume the first two labels are already used up and we want to start printing at the third one:

This results in the following output:
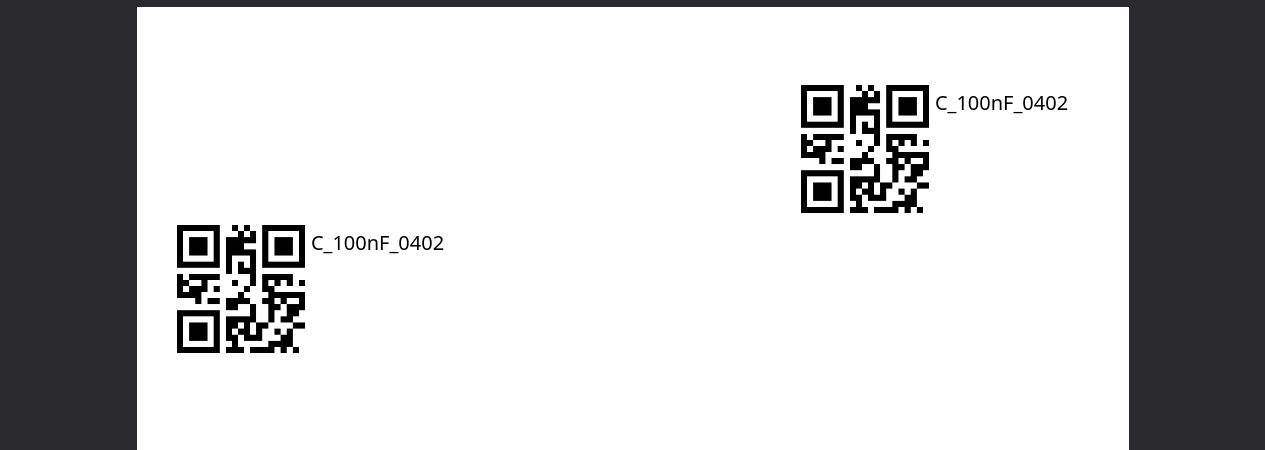
When printing small labels with many of them on a single sheet, it can be confusing and annoying to keep track of the amount of labels skipped. Since this is such a common task, the plugin automatically remembers how many labels have been used up already and populates the Skip label positions field with the correct number of labels to skip after the previous printing operations. For example, after the above shown printing operation, the plugin automatically remembers that next time, it needs to skip four labels and pre-populates the field with that value:

When an entire page or more is used up, this counter automatically wraps around to the correct value for the next page.
Of course, this feature only makes sense when printing a lot of labels on the same label sheet (and therefore label sheet layout) back-to-back. Since this value is stored only once globally, when switching between different label sheets (for example because multiple users are printing on different sheets at once) the value is probably not accurate and needs to be manually checked and possibly adjusted each time.
Ignore label size mismatch
To ensure the desired result, the plugin automatically check whether the size of the label according to the selected template matches the size of the labels on the selected sheet layout.
If that is not the case, the user is presented with an error message. This can happen in a few different scenarios:
- Manually selecting a sheet layout that doesn’t match the label template:

- When automatic layout selection is enabled and the label template specifies a sheet layout but its label size does not match that of the template (no longer relevant as of InvenTree
1.0.0):
- When automatic layout selection is enabled but the label template doesn’t specify any layout in the metadata and no exact size match was found:

In any of these cases, you might want to continue anyway, e.g. because you may not have the correct sheet at hand. To do so, you can enable the Ignore label size mismatch switch to override these safety checks and print anyway. If the label template doesn’t fit exactly, it is aligned at the top left corner of the physical label. The result might look something like this:

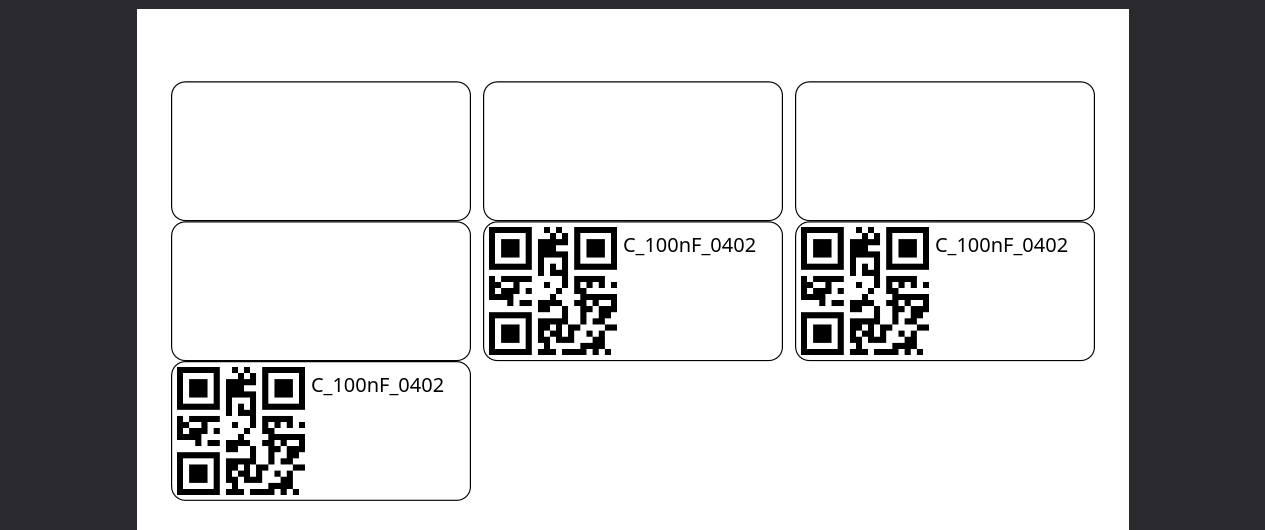
Print border
When debugging or testing your sheet layouts and templates, it might be useful to see the shape of the physical label (e.g. for the previous image). For this purpose, you can enable the Debug: Print border switch, to print a 0.25mm border around the label. This border is aligned on the INSIDE of the label, so it doesn’t overlap other labels but will cover up a tiny bit of area on the edge of your label. The scale and position of the label content are not affected by the border.
When skipping labels, the skipped positions also have a border.
The result looks something like this:
Label fill color
Similarly to the border, you might want to fill the background of the labels with a color to debug your template and see what is covered. This can be achieved by entering the desired color in the Debug: Label fill color field. Any CSS color string is valid. To have no fill color, use the value “unset”, which is also the default. Leaving the field empty doesn’t work unfortunately since I wasn’t able to get the form to accept an empty field.
The result might look something like this with color “lightgreen”:
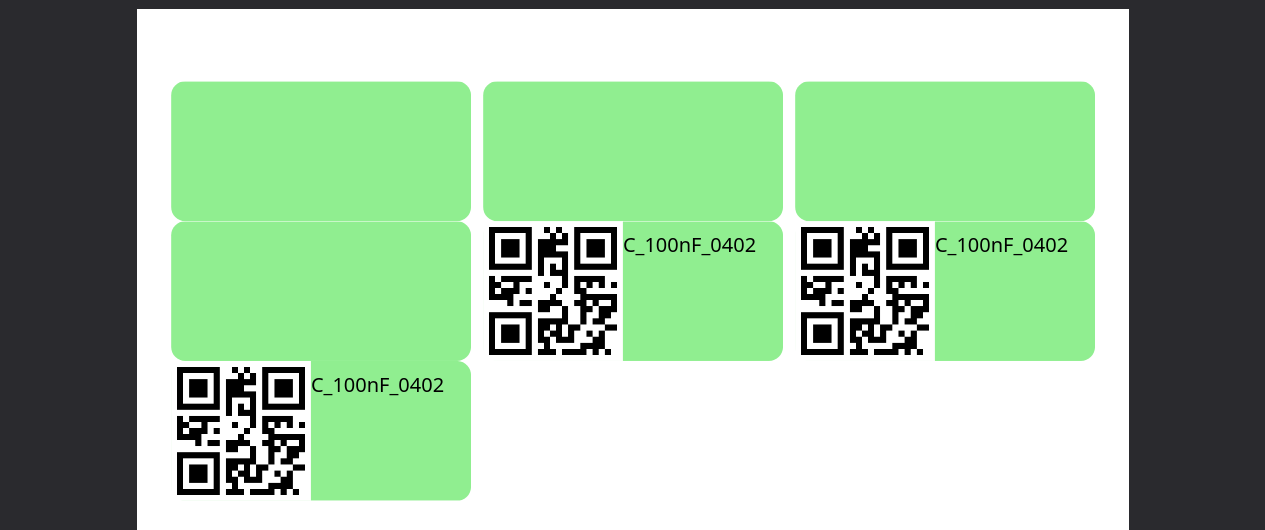 (White lines between rows are just rendering defects of my browser)
You can also combine this option with the border.
Errors
In addition to the errors covered in section Ignore label size mismatch you might encounter the following error messages when printing:
- Sheet layout ‘[sheet_layout_code]’ does not exist.: This means that an API request was received with an invalid sheet layout in the selection. During normal operation, this should never happen because the dropdown list is automatically populated with all valid options. If you are using the API from a 3rd party application, this could mean that the application has requested to print using a sheet layout which is either not supported by this plugin or the application has a typo in the sheet layout code.
- No labels were generated: This means that you are not printing any labels (Number of labels = 0) and are not generating any empty fields either (Skip label positions = 0). This would result in a blank page and is likely not what you want.
-
Error printing label: This error along with another error box containing a Python exception string means that something has gone wrong in the plugin code that is not an intentional error message. Example:
 If you see this, feel free to file a bug report. See Reporting and fixing bugs on how to do so.
Settings
This section describes the settings available in the plugins settings page.
Default sheet layout
This setting allows you to specify which sheet layout is selected by default when opening the printing dialog. It makes sense to set this either to some Auto option or to the layout you are using the most. The default is Auto (round), which is probably fine for most use-cases.
Common Issues
“No matching distributionfound” / “Could not find a version that satisfies the requirement”
This means that the Python version installed on the InvenTree host is too old for the plugin. This error may occur when trying to install plugin versions up to 1.2.2 on an InvenTree instance installed bare-metal or via the package installer on a system with Python 3.9. This is because the plugin used to require Python >= 3.11, which is the version used in the containers, therefore working for most setups. As of plugin version 1.3.0, the version requirement has been reduced, and this should no longer occur.
Contribution
If you have ideas for new features, found typos, have encountered a bug or want to add more sheet layouts, feel free to contribute to this plugin by filing an Issue or creating a Pull Request. See Plugin development setup to learn how you can set up your development environment to test your modifications.
See the below information and instructions for common contribution types.
Reporting and fixing bugs
If you have encountered a problem or a bug with the plugin, please file an Issue with the Bug Report template.
The template requires you to provide a screenshot of your label template configuration. You can get this by going to https://your.inventree.url/web/settings/admin/labels and Editing the template in question. You need administrator privileges to do this. If you don’t have them, ask your administrator. This page might look something like this:
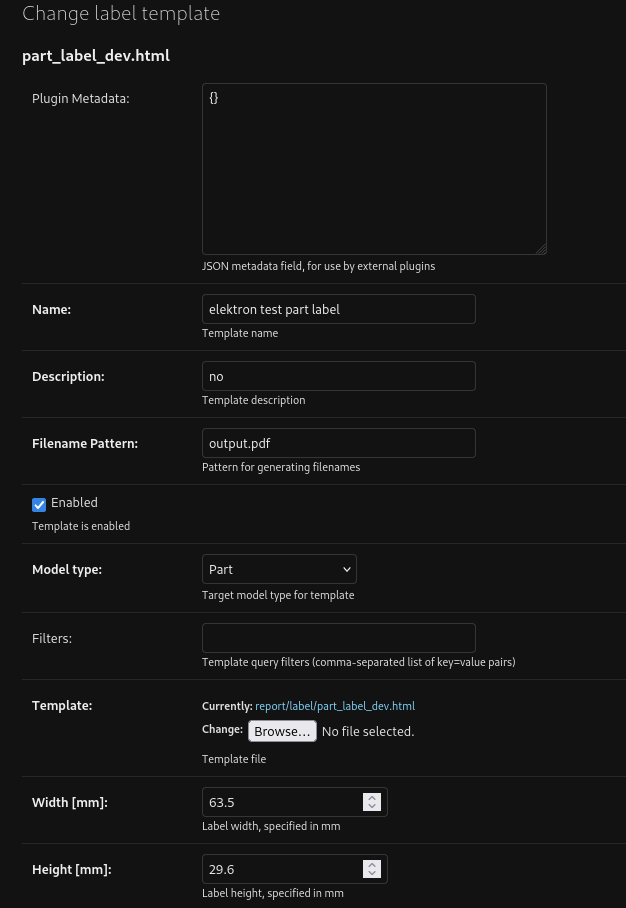
In addition to this screenshot, you will be asked to attach the label template file which can be downloaded by clicking on the Template in the list and copying the code. Please make sure this file doesn’t contain any confidential data and remove it if it does.
You will also be asked to provide some other information about when and how the bug ocurred which is described in the template.
PRs
If you know how to fix a bug, feel free to create a Pull Request with the solution.
Adding new layouts
If you have a label paper layout that is not yet supported by this plugin, please file an Issue with the Sheet Layout template
In the template you will be asked to provide some basic information about the sheet layout such as possible manufacturers/suppliers and where the product can be purchased.
Then, you will be presented with a code template of a layout configuration which you must fill out with your values. The options are commented and mostly self-explanatory.
If your layout uses a page size that has never been used before, you will also be asked to define the paper format with a name and its dimensions. Otherwise you can simply reference an existing format and omit that part of the issue template.
Adding sheet layouts yourself
We will review your layout and add it to the main plugin distribution as soon as possible. However, if you need the layout immediately and cannot wait for it to be added officially, you can fork the repository and include it yourself.
To do so, you can edit the advanced_sheet_label/layouts.py file. In there you will find a dictionary of all defined paper sizes and a dictionary of all defined sheet layouts. After filling out the code in the Issue template, you can simply append the new definitions at the end of the dictionaries.
# ... more file content

PAPER_SIZES = {
    "A4": PaperSize("A4", 210, 297)
    # ... possibly more paper sizes
    # add your new paper size here if required
}

LAYOUTS = {
    "4780": SheetLayout(
        display_name="4780",
        page_size=PAPER_SIZES["A4"],
        label_width=48.5,
        label_height=25.4,
        columns=4,
        rows=10,
        column_spacing=0,
        row_spacing=0,
        corner_radius=0
    ),
    # ... more sheet layouts
    # add your new sheet layout here
}

# ... more file content
Make sure that the layout codes (the strings before the colon) are UNIQUE, otherwise the plugin will not work.
To install the modified plugin in your InvenTree instance, simply enter YOUR repository link instead of the package name in the installation modal. Example with this repository:
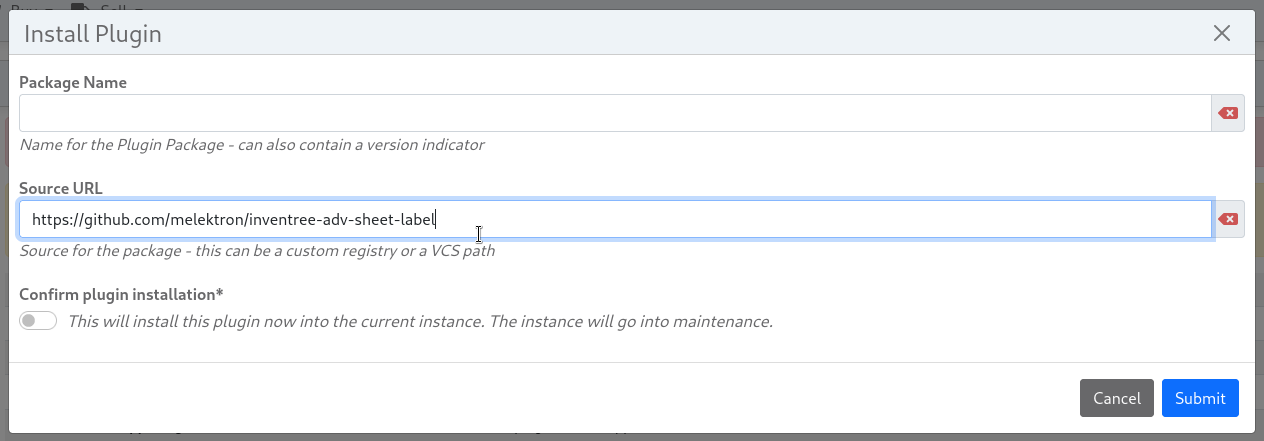
Make sure to uninstall the official plugin before you install your fork, otherwise they will conflict!
Plugins installed in this way seem to not be added to plugins.txt file properly in InvenTree version
1.0.5+. For me, I have been able to install the plugin directly from GitHub by stopping the InvenTree server, adding the URL to the plugins.txt file and then runninginvoke plugins. Alternatively, you can install it directly using pip:pip uninstall inventree-adv-sheet-label # uninstall normal package pip install git+https://github.com/melektron/inventree-adv-sheet-label.gitYou have to adjust the link to your repo.
If you have added a sheet layout yourself, you are still encouraged to create a Pull Request with your changes so the changes can be added to the mainline plugin for everyone to benefit.
Plugin development setup
When making bigger changes than just adding layouts, it is recommended to set up a proper development environment.
To develop the plugin, setup an InvenTree development instance using devcontainers according to this this official documentation. It is also recommended to setup the example dataset for experimenting.
Then clone this repo (or your fork) separately on your host computer and link it to the devserver according to the documentation.
It is also recommended to save the workspace as a file (maybe somewhere in inventree repo but don’t commit it) and include the intellisenseconfig as well as editor layout there.
The InvenTree intellisense path might be something like /home/inventree/src/backend/InvenTree instead of the path from the documentation.
After that, start the InvenTree server with the debugger and the plugin should now be usable and debugable.
Detail section
License:
MIT
inventree-adv-sheet-label
Website
https://elektron.work
Issue Tracker
Sourcecode on GitHub
melektron/inventree-adv-sheet-label/