
Docker Setup Guide
13 Mar 2024 Oliver
In this post, we will run though a tutorial for setting up InvenTree in a Docker container. We are installing a stable version of InvenTree, which (at the time of posting) is version 0.14.2.
Digital Ocean
We will be using a Digital Ocean droplet to host our InvenTree installation. Digital Ocean provides a simple and cost-effective way to host web applications, and is a great choice for hosting InvenTree.
While we use Digital Ocean for this tutorial, the steps outlined here should be applicable to any cloud hosting provider.
Note: Digital Ocean is a sponsor of the InvenTree project, and provides hosting for our demo server. We are grateful to the Digital Ocean team for their ongoing support of the InvenTree project.
InvenTree in Docker
InvenTree can be run in a Docker container, which provides a simple and consistent way to run the application. This is the recommended way to run InvenTree in a production environment, without needing to worry about the complexities of setting up all the required software dependencies.
Our documentation server provides the following docker guides, which are a great starting point for anyone looking to run InvenTree in a Docker container:
Docker Basics
The Docker Basics guide provides a good introduction to how InvenTree works in Docker, and includes a lot of useful background information about Docker itself.
Docker Installation
The Docker Installation guide provides a step-by-step guide to setting up a production InvenTree installation using Docker / Docker Compose.
In this blog post, we will follow through the steps outlined in the Docker Installation guide, to get an InvenTree installation off the ground with minimal fuss.
Docker Setup Tutorial
Prerequisites
Before we start, you will need a Digital Ocean account. The following steps assume that you have created an account, and are logged in!
Also, if you are going to be using a custom domain name, you will need to have access to the domain name settings (e.g. via your domain registrar). This is outside the scope of this tutorial, but is required if you want to access InvenTree using a custom domain name.
Digital Ocean Droplet
First, we need to create a new Digital Ocean droplet. We will be using the Docker base image, which provides a simple and consistent environment for running Docker containers.
Create Droplet
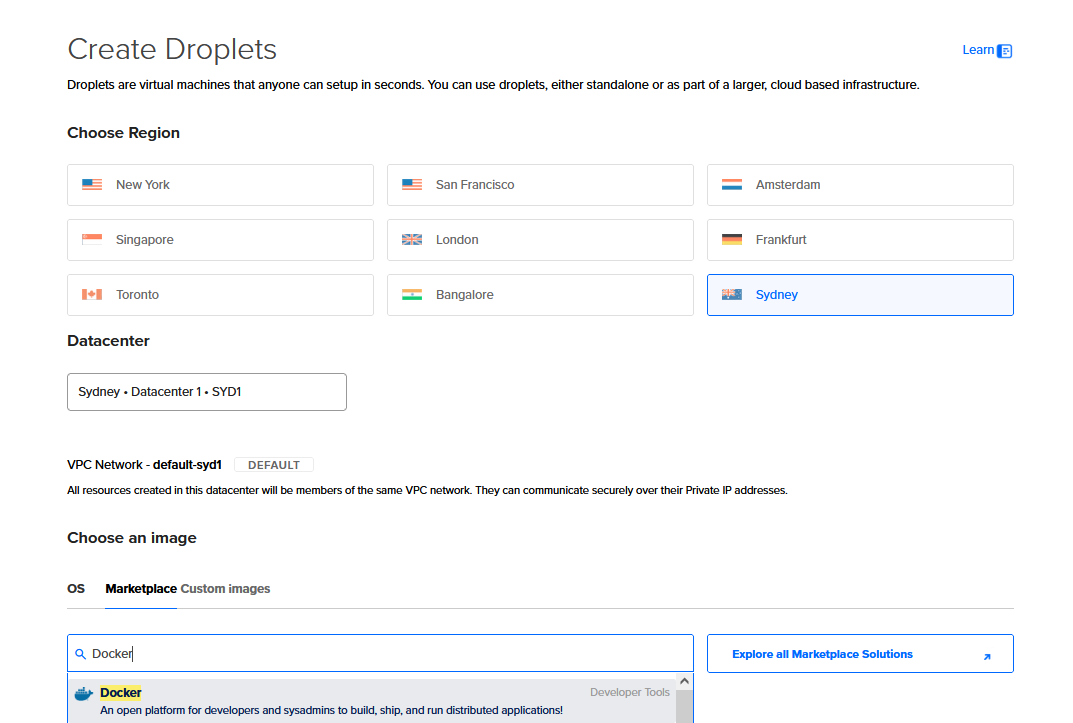
Head to https://cloud.digitalocean.com/droplets and click the “Create Droplet” button.
Choose the server region which you would like to use, and select the “Docker” base image under “Marketplace”:
Then, click the “Create Droplet” button at the bottom of the screen.
Login to Droplet
After a few moments, the droplet will be created and ready for use. Select your newly created droplet, and navigate to the “Access” tab:
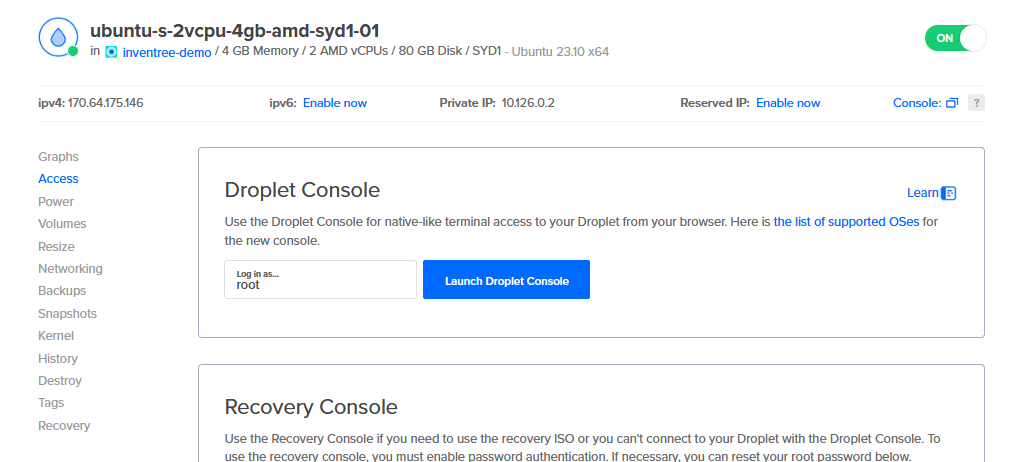
You can login to the droplet using multiple methods. Here, for simplicity, we will use the online console window. Select the “Launch Droplet Console” button to open a new window.
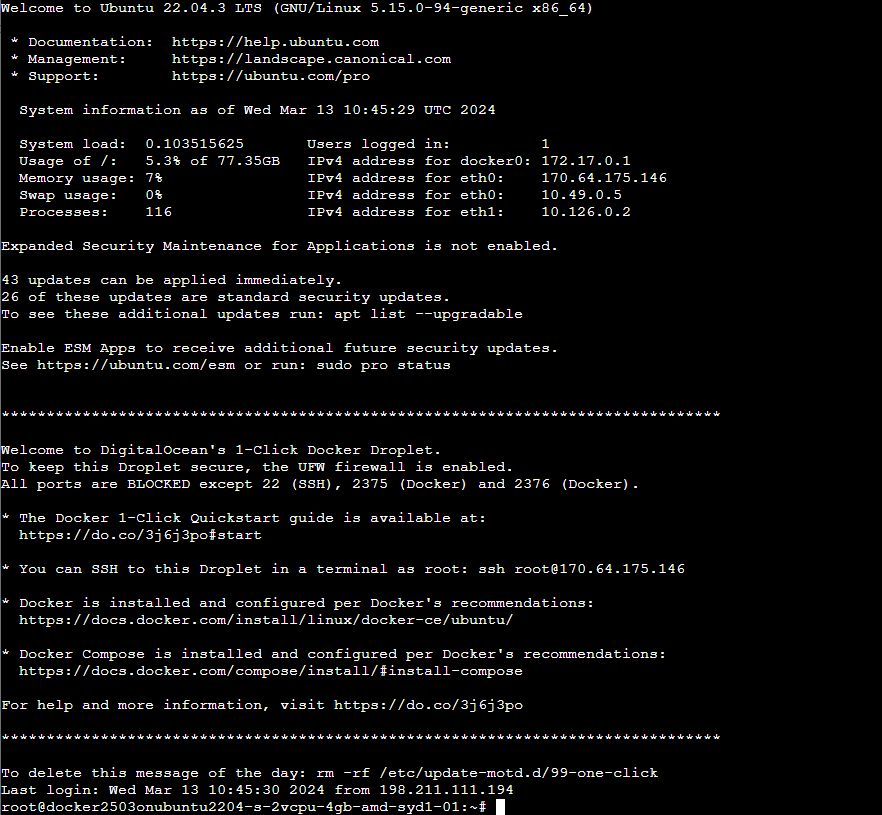
You should now be logged into the new droplet, and see the following shell prompt:
Droplet Setup
Before we start to setup InvenTree, we will create a new user account.
Create User
Create a new user account using the adduser command:
adduser inventree
(run through the prompts to create a new user account).
Add User to Docker Group
Add the new user to the docker group, so that they can run Docker commands:
usermod -aG docker inventree
Change to InvenTree User
Switch to the new user account:
su - inventree
cd ~
You should now be logged in as the inventree user, and running from the /home/inventree/ directory.
Docker Setup
We will now grab the required setup files for the InvenTree Docker installation.
Download Files
The following files are required to setup InvenTree in Docker:
- docker-compose.yml - the Docker Composer file which defines the InvenTree setup
- .env - the environment file which defines the InvenTree configuration
- Caddyfile - the Caddy web server configuration file
These files can be downloaded directly from our GitHub repository:
wget https://raw.githubusercontent.com/inventree/InvenTree/master/docker/docker-compose.yml
wget https://raw.githubusercontent.com/inventree/InvenTree/master/docker/.env
wget https://raw.githubusercontent.com/inventree/InvenTree/master/docker/Caddyfile
You should now have the three required files located in /home/inventree/
Configure Environment
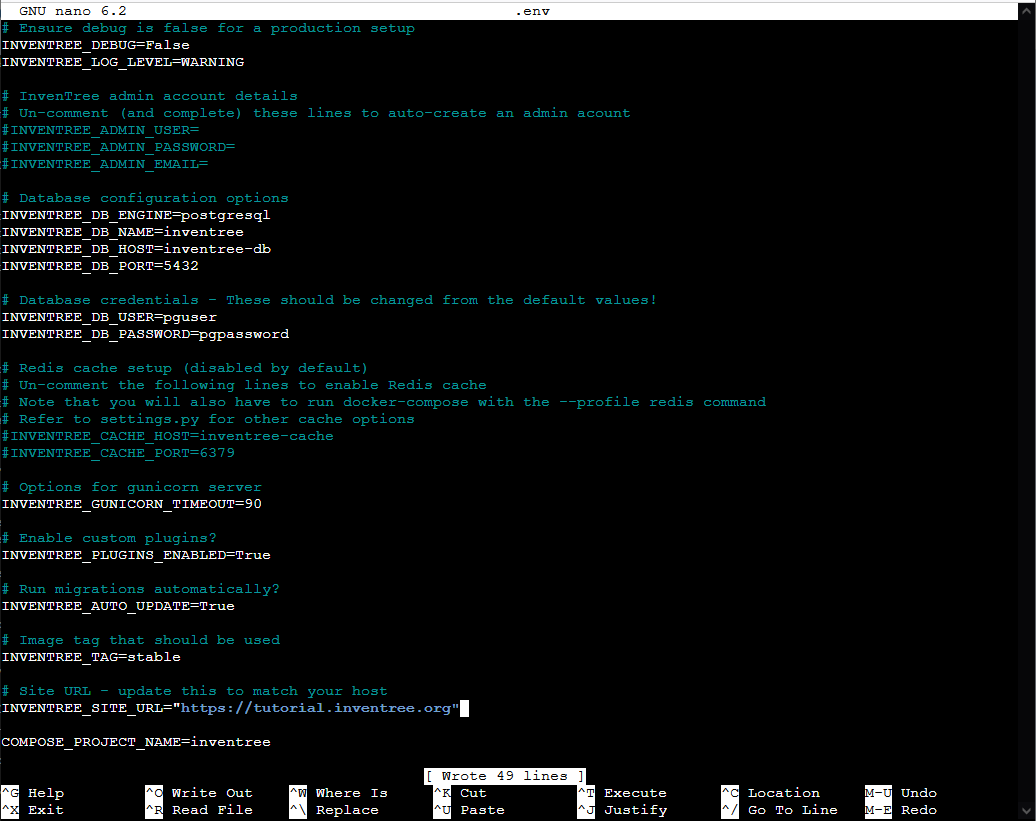
Edit the .env file to configure the InvenTree environment. This file contains a number of settings which define the InvenTree installation.
Most of these settings can remain untouched. The only setting we are going to change for this installation is the INVENTREE_SITE_URL setting. This is the URL which InvenTree will be accessed from.
Note: You can adjust other settings in the *.env file now, if required. However, the defaults should be suitable for most installations, and certainly for this tutorial.*
In this example, we will set INVENTREE_SITE_URL to https://tutorial.inventree.org.
InvenTree Setup
Now, we will start the InvenTree installation. Note that we are simply following the docker setup guide at this point!
Initial Database Setup
Run the following command to perform initial database setup:
docker compose run --rm inventree-server invoke update -s
This command will create the initial InvenTree database, and run required database migrations, which will take a few minute to complete.
Once the process is complete, you can proceed to the next step!
Start InvenTree Containers
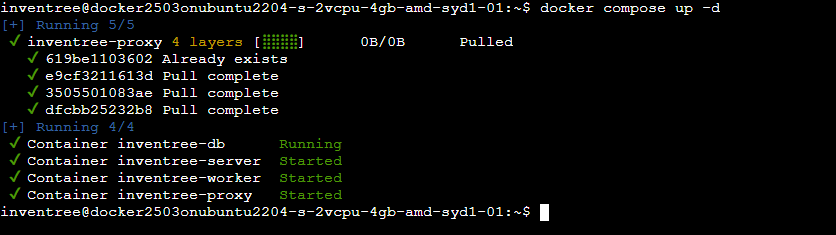
The docker compose file defines the InvenTree setup, and sequences a number of containers which are required to run InvenTree. To start the InvenTree installation, run the following command:
docker compose up -d
This will start the InvenTree containers in the background, and you should see a number of messages as the containers are started:
Note that you can view the status of the containers at any time using the following command:
docker compose ps

Access InvenTree
InvenTree should now be running, and ready to receive requests from the configured URL (in our case, https://tutorial.inventree.org).
However, we need to ensure that the URL is correctly configured to point to the Digital Ocean droplet!
Note: If you do not have a domain name, you can use the public IP address of the Digital Ocean droplet to access InvenTree. Just remember to set that IP address to the INVENTREE_SITE_URL setting in the *.env file.*
Add Domain
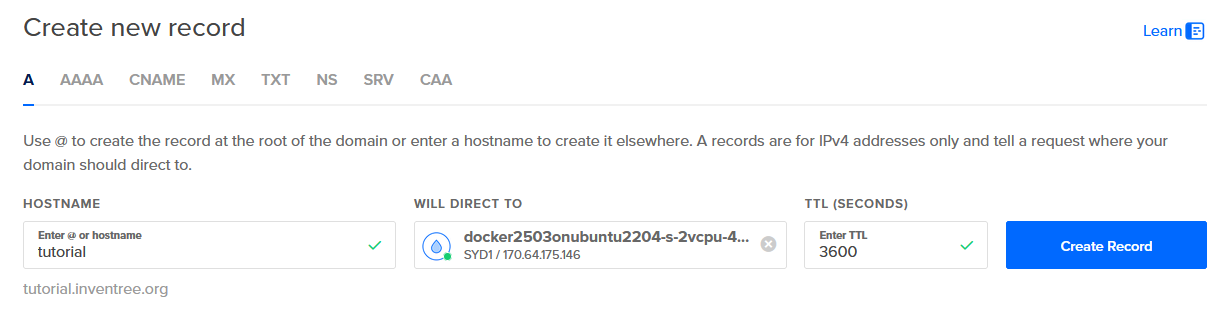
Navigate to https://cloud.digitalocean.com/networking/domains and add a new domain, which matches the INVENTREE_SITE_URL setting, and points to the public IP address of the Digital Ocean droplet.
For our setup, we only need to create a new A record (as the root domain and DNS has already been configured).
Chill Out
It may take a few minutes for the DNS changes to propagate. You can check the status of the DNS changes using a tool like https://dnschecker.org/.
Restart Caddy
Once the DNS changes have propagated, you may need to restart the Caddy web server to pick up the new domain name settings:
docker compose restart inventree-proxy
Access InvenTree
You should now be able to access InvenTree using the configured domain name (e.g. https://tutorial.inventree.org):
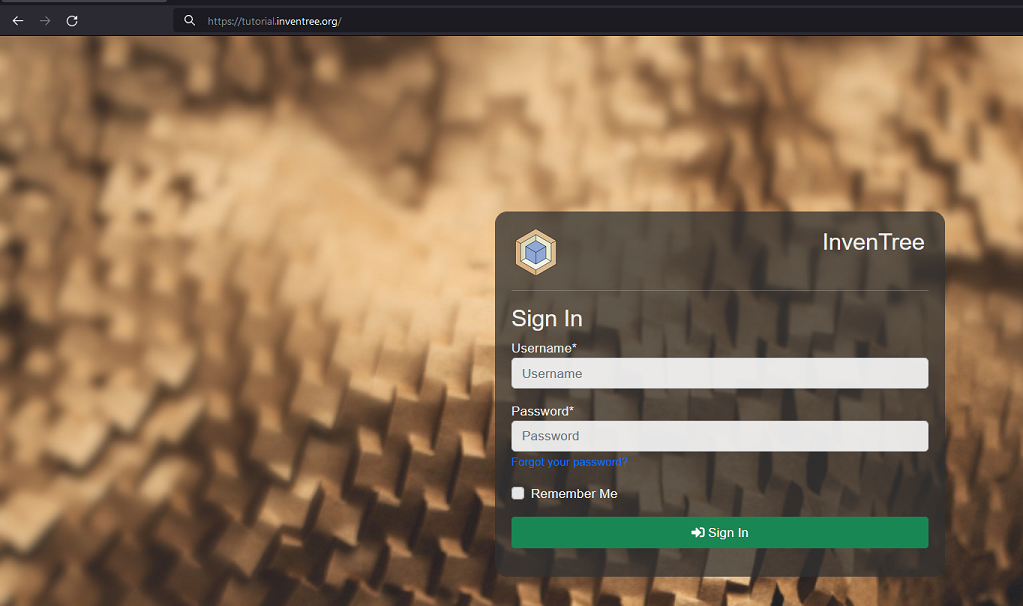
Success! You have now setup InvenTree in a Docker container, and can access the application from the configured domain name.
But, we’re not done yet! We need to setup some initial data in the InvenTree installation.
Setup Data
The InvenTree installation is now running, but it is empty! We need to add some initial data to the system. We could create an admin user, add some parts, and setup some stock locations. But, let’s take a shortcut!
Demo Dataset
InvenTree provides a demo dataset which can be loaded into the system to provide some initial data. This dataset includes a number of parts, stock items, and other data which can be used to explore the InvenTree system.
docker compose run --rm inventree-server invoke setup-test -i
We should now be able to login to the InvenTree installation using the default admin user account:
- Username: admin
- Password: inventree
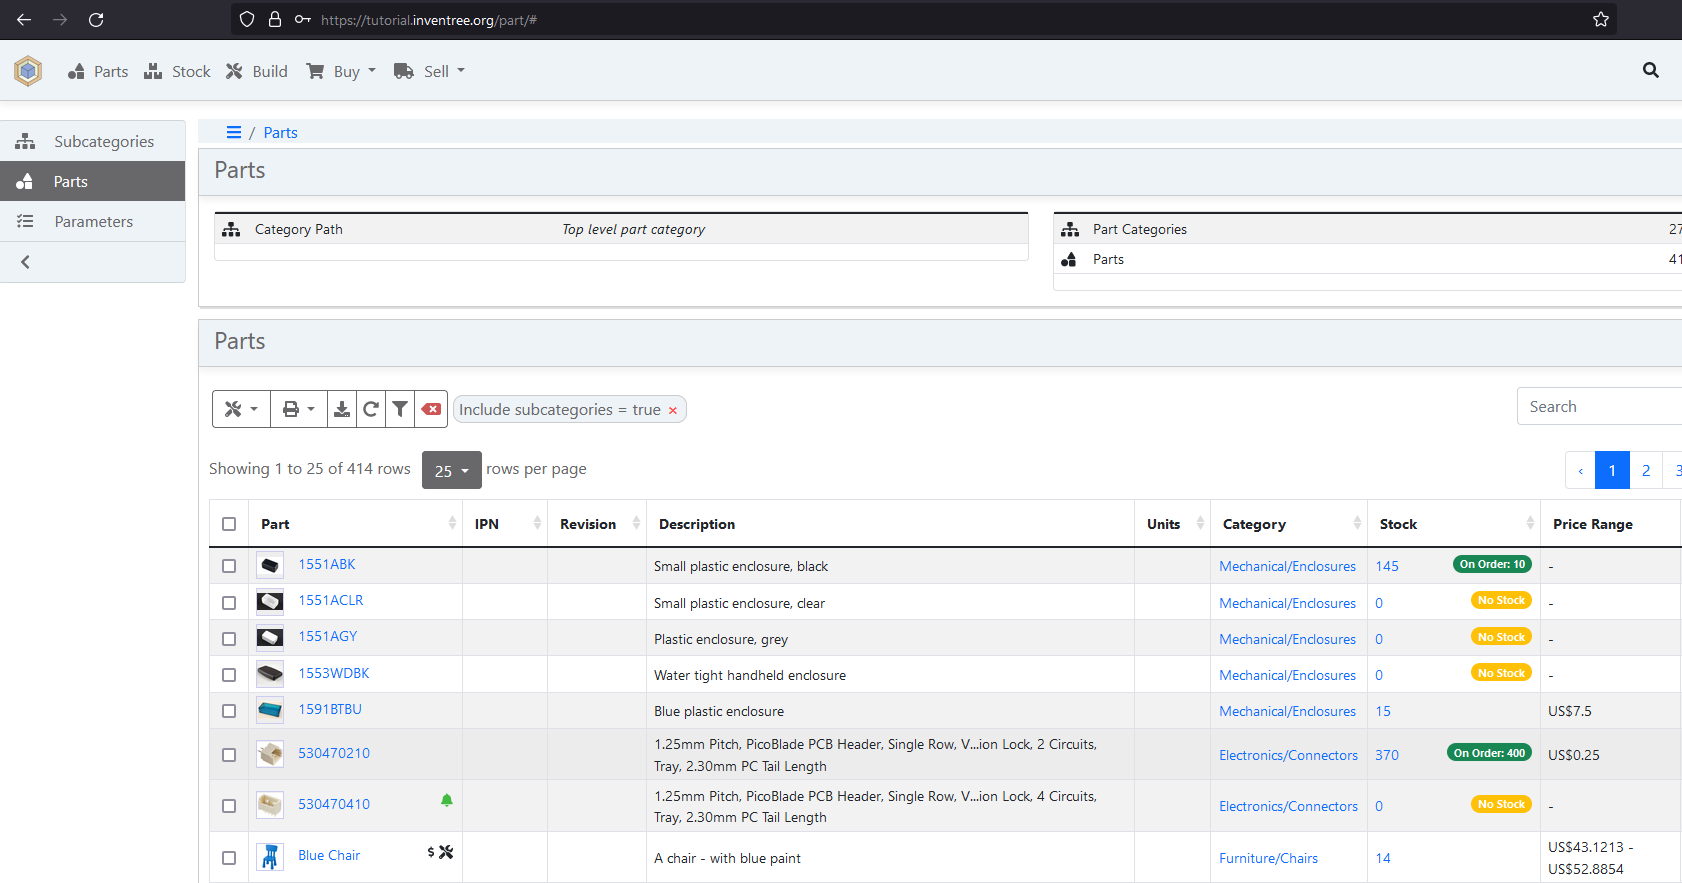
And, now we are in! We have successfully setup InvenTree in a Docker container, and have loaded the demo dataset to explore the system.
Conclusions
In this tutorial, we have setup InvenTree in a Docker container, running on a Digital Ocean droplet. We have configured the InvenTree environment, and loaded the demo dataset to explore the system.
Cloud Provider
We have used Digital Ocean as our cloud provider, but the steps outlined here should be applicable to any cloud hosting provider - with some tweaking!
SSL Certificate
Caddy, the proxy server used in the InvenTree Docker setup, automatically configures SSL certificates using Let’s Encrypt. This means that your InvenTree installation is automatically secured using HTTPS (and you don’t need to worry about setting up SSL certificates).
Note: There are some caveats here, you should read the Caddy documentation!
Further Reading
This tutorial is a simple guide to getting InvenTree up and running in a Docker container. For more advanced usage, you should read the InvenTree Setup Guide guide, which provides a lot more detail about the InvenTree Docker setup.
Project Sponsorship
InvenTree is an open-source project, and is sponsored by a number of companies and individuals. We are grateful to the Digital Ocean team for their ongoing support of the InvenTree project!
If you would like to sponsor the InvenTree project, please refer to our contribution page for more information.